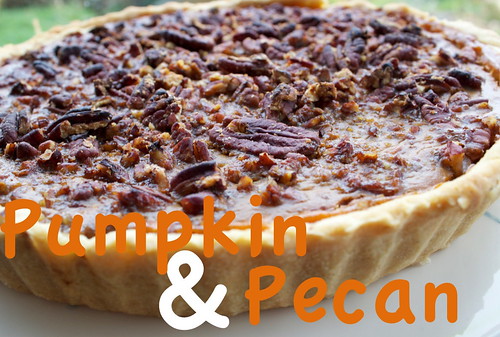
Pumpkin Pie is one of those American recipe's that us Brit's are a little bit baffled by.
Firstly Pumpkin in a Pie (!!?) but secondly because we are not familiar with the texture or taste that this pie has to offer. Now I love America & feel a little bit American deep down inside, so therefore I like to make things that are not available here in the Uk & enjoy cooking food that tastes so dam good! This recipe I have adapted from a very basic recipe I found on Pinterest & it is my favourite that I have made so far! So if you have never made a Pumpkin Pie or want to try a new recipe, then take a little look over this one..... side note: look how good it looks!!

Ingredients:
+ 1 Can of Libby's Unsweetened Pumpkin Solids
+ 1 Cup of Caster Sugar
+ 1 Cup of Brown Sugar
+ 2 Teaspoon of Cinnamon
+ 2 Teaspoon of Ginger
+ 1 Teaspoon of Vanilla Essence
+ 1/2 Pint of Semi Skimmed Milk
+ 2 Medium Eggs
+ Pecans (For Decoration)
+ 1 Sheet of Short Crust Pastry ( For Pie Case)
Tools:
+ 9 Inch Pie Tin
+ Mixing Bowl
+ Fork
+ Measuring Cups
+ Measuring Spoons
+ Measuring Jug
+ Rolling Pin
+ Hand Held Blender
+ Grease Proof Paper
+ Baking Beans
+ Cooling Rack
+ Small Sandwich Bag
1. As always you have to start with the basics- Pre-heat your oven to 220c ready to cook your pie case. Next grease your pie tin with either butter or oil (I personally use oil as I find it tends to grease the tin better then Butter!) so that your pie will slide out nicely & not get stuck- worst thing ever!
2. Next is the most complex part of the whole recipe- rolling out your pastry to be the correct size of your pie tin. Now for some reason I always struggle with this part as my pastry rolling skills are not the most professional or pleasing to the eye!! All I can say is just make sure it covers the whole of you Pie Tin, leaving plenty hanging over the sides as you want a nice crust as it will shrink once cooked- I always prefer to have more then none! Once you have smooshed it into the tin with your hands & you have gone along the top of the tin making sure to push it into the crust part (how technical does that sound!?), you can then cut all of the excess pastry off & prick the base of the case with a Fork.
3. Now I never knew what the term 'Baking your base blind' meant(face- palm!), so for all of you out there who are screaming at your screens "Me too" let me talk you through what the hell this process is, & just for the record you don't need to be blindfolded to do this step! The term basically means pre-baking your base so that the crust is a lot stronger to enable it to hold a more softer moist filling, without it getting soggy. So for this you need to grab your Baking Paper & cut out a circle the same size as the inside of your shell (where you would place the filling) & then place it in the middle of the base. Next add your Baking Beans, or if you don't own any then another alternative is using some copper coins to add on top of the Baking Paper- just make sure to keep them away from the crust as no one wants the taste of coins in a pie!! Pack them into the whole base of the pie so that it is pretty much filled all in with beans & then place in the oven for 10-15 mins to cook.
4. Whilst your base is cooking you can now start to prepare the filling. Firstly measure out all of your dry ingredients into your Mixing Bowl (Sugar, Ginger & Cinnamon), remember it doesn't matter how messy or lumpy it looks as we will blended it all together later.
5. Now prepare your wet ingredients- in a separate cup or small bowl, break your Two Eggs & give them a little beat together, then in a Measuring Jug measure out your Milk & add your Vanilla Essence to the Milk.
6. Add your prepare wet ingredients to your dry ingredients & give it a little stir together to mix it up. Lastly grab your Tin of Pumpkin & using the Fork add it into your running looking filling, making sure you scrape out every single bit of Pumpkin Puree. At this point I began to panic as the mixture would not combine together & looked like it was separated, but our trusty Blender makes everything ok in the end!
7. Grab your Hand Held Blender & start blending it all together, you will see that it all starts to get thicker & creamier as you keep mixing & blending away, making all of the lumps disappear to leave you with a lovely thick, rich looking filling. Now there is no given time limit as to how long you should do this for, you just want a nice smooth, thick looking filling.
8. Your Pie Crust should now be cooked so take it out of the oven & allow it to cool on a Cooling Rack for about 5 mins before you pour in your filling. Remove your Beans & Baking Paper from the base & carefully tip in your filling.
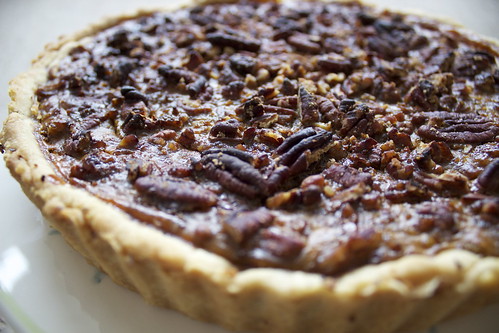
9. This last part is optional, but for me I love the taste of Pecans & Pumpkin together so I decided to add some crushed Pecans to the top of my pie! All you need to do is grab a Rolling Pin & a Small Sandwich Bag & add a few Pecans into the bag to start crushing. Seal up the top of the Sandwich Bag & using the Rolling Pin gently tap/crush the Pecans. Once your happy with how they look, sprinkle them onto the top of the filling adding a few whole ones if you wish.
10. Cooking time!! Carefully place (I say carefully as I have previously managed to slosh half of the filling onto the kitchen floor!) your pie into the oven & allow to cook for 30-45 mins or until your knife comes out clean when inserted into the middle of the pie.
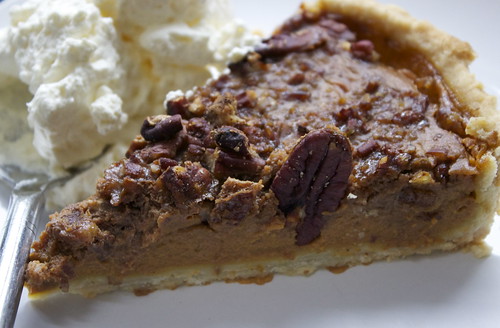
11. After enough time has passed take your Pie out of the oven & let it cool on the Cooling Rack & there you have it!! Serve with lashings of Whipped Cream & a cheeky Chi Latte for the full autumn effect!!!
If you give this recipe a go, make sure to let me know how yours turned out or even better Tweet Me or Instagram Me a picture of it!
Much Love,
Elle
xoxoxo
♥